
Acer Aspire XC-603G motherboard TX1 pinout shows the connection layout for the motherboard’s TX1 connector. It helps understand where to connect cables and components, making it easier to set up or troubleshoot your computer.
This article provides an easy-to-understand overview of the Acer Aspire XC-603G motherboard TX1 pinout, explaining its purpose, layout, and how it can be used effectively.
Table of Contents
What is a Motherboard?
A motherboard is the main circuit board inside a computer. It connects all the parts, like the CPU, memory, and storage, allowing them to communicate and work together. It’s essential for the computer to function properly.
How to tell what Motherboard I have?
To know what motherboard you have, press Windows + R, type “msinfo32,” and press Enter. In the System Information window, look for “BaseBoard Manufacturer” and “BaseBoard Product” to find your motherboard details easily.
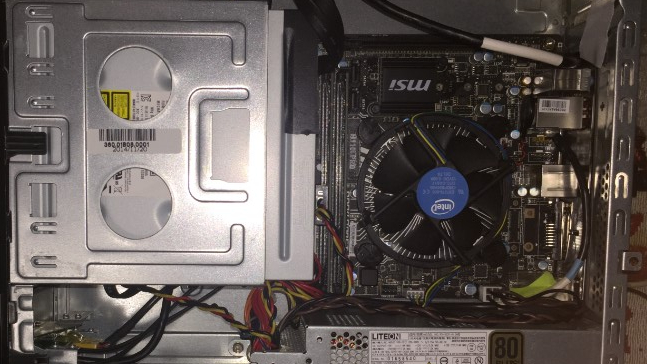
Aspire xc-603g:
The Acer Aspire XC-603G is a compact desktop computer designed for basic tasks like web browsing, office work, and media playback. It’s affordable and suitable for users needing a simple, reliable machine for everyday use.
Understanding the TX1 Pinout on the Acer Aspire XC-603G Motherboard
The TX1 pinout on the Acer Aspire XC-603G motherboard shows how the pins are arranged and used for connecting various components. Understanding this layout helps ensure you connect parts like the power switch, LEDs, and USB ports correctly.
If the pins are not connected properly, the computer might not work as expected. Knowing the TX1 pinout is important for building or fixing the Acer Aspire XC-603G system.
Detailed Layout and Functions of the TX1 Pinout
The layout of the TX1 pinout on the Acer Aspire XC-603G motherboard is carefully designed to accommodate various functions. While the exact configuration may vary slightly depending on the specific model or revision of the motherboard, the following is a general breakdown of the most common pins and their functions:
1. Power Supply Pins (VCC and Ground)
- VCC (Power) Pins: These pins provide the necessary voltage to power various components. They are usually labeled as “VCC” or “PWR” and are essential for ensuring that components such as fans, hard drives, and LED indicators receive adequate power.
- Ground (GND) Pins: Ground pins serve as a return path for electrical current, helping to stabilize the system and prevent electrical noise or interference. These pins are labeled as “GND” and are critical for the overall stability of the motherboard.
2. Data Transmission Pins
- Data+ (D+) and Data- (D-) Pins: These pins are responsible for data transmission between the motherboard and connected components. The “D+” and “D-” labels indicate the positive and negative lines for differential data transmission, commonly used in USB interfaces and other high-speed data connections.
3. Control and Signal Pins
- Reset (RST) Pin: The reset pin is used to restart the system without powering it off completely. It can be connected to a reset switch on the front panel of the computer case.
- Power Switch (PWR_SW) Pin: This pin is connected to the power switch on the computer case and is used to turn the system on or off.
- LED Indicators (PWR_LED, HDD_LED) Pins: These pins are connected to the power and hard drive activity LEDs on the front panel, providing visual indicators of the system’s status.
4. Peripheral Connection Pins
- Fan Control Pins: These pins are used to connect and control system fans. They may include power, ground, and control lines that allow the motherboard to regulate fan speed based on temperature sensors.
- Speaker (SPK) Pin: This pin connects to a small speaker that provides system beeps and alerts during startup or error conditions.
Practical Applications of the TX1 Pinout
Knowing the TX1 pinout on your Acer Aspire XC-603G motherboard opens up a range of possibilities for customization and troubleshooting. Here are some practical applications:
1. Upgrading Your System
- Adding Additional Storage: If you want to add an extra hard drive or SSD to your system, the TX1 pinout provides the necessary connections. By properly wiring the power and data lines, you can expand your storage capacity without much hassle.
- Enhancing Cooling Solutions: Overheating can be a concern in compact systems like the Acer Aspire XC-603G. By using the TX1 pinout to connect additional fans, you can improve airflow and keep temperatures in check, ensuring your system runs smoothly.
2. Customizing Your PC Build
- Front Panel Modifications: The TX1 pinout includes connections for the power button, reset button, and LED indicators on the front panel of your computer case. If you’re customizing or building a PC from scratch, understanding these connections allows you to design the front panel layout according to your preferences.
- Lighting and Aesthetic Enhancements: If you’re into customizing the aesthetics of your PC, you can use the TX1 pinout to add LED strips or other lighting elements. By connecting them to the appropriate power and control pins, you can create a visually appealing setup.
3. Troubleshooting Hardware Issues
- Diagnosing Power Issues: If your system fails to power on, the TX1 pinout is one of the first areas to check. Ensuring that the power switch and LED connections are correctly configured can help identify whether the issue lies with the motherboard, power supply, or another component.
- Resolving No-Post Issues: When a system fails to complete its Power-On Self-Test (POST), it may indicate a problem with the TX1 pinout connections, especially if the reset or power switch pins are incorrectly wired. By systematically checking these connections, you can troubleshoot and resolve no-post scenarios.
Common Pitfalls and How to Avoid Them

While working with the TX1 pinout can be straightforward, there are some common pitfalls that users should be aware of:
1. Misidentifying Pins
- Issue: One of the most common mistakes is misidentifying the pins, especially if the labeling on the motherboard is unclear or faded.
- Solution: Always refer to the motherboard manual or a reliable pinout diagram specific to your Acer Aspire XC-603G model. Double-check each connection before powering on the system.
2. Short-Circuits Due to Loose Connections
- Issue: Loose or improper connections can lead to short-circuits, which can damage components or the motherboard itself.
- Solution: Ensure that all connections are secure and that no pins are touching each other or any conductive surfaces. Using insulated connectors can help prevent accidental shorts.
3. Overloading Power Pins
- Issue: Connecting too many components to a single power pin can overload the circuit, leading to instability or failure.
- Solution: Distribute the power load evenly across available power pins and avoid daisy-chaining multiple high-power components to a single pin.
In-Depth Troubleshooting for TX1 Pinout Issues
When working with the TX1 pinout on the Acer Aspire XC-603G motherboard, encountering issues is not uncommon, especially for those new to PC building or upgrading. Here’s a more detailed guide on how to troubleshoot and resolve common problems:
1. System Fails to Power On
- Check the Power Switch Connection: Ensure that the power switch pin is correctly connected to the PWR_SW pin on the TX1 pinout. A loose or incorrect connection can prevent the system from powering on.
- Verify the Power Supply: Make sure that the power supply is functioning correctly and that it provides the necessary voltage to the motherboard. A faulty power supply can mimic pinout issues.
- Inspect for Short Circuits: Look for any signs of short circuits around the TX1 pinout, such as burnt pins or a burning smell. If a short circuit is detected, disconnect the power immediately and inspect all connections.
2. No Display Output
- Check the Data Pins: Ensure that the data pins (D+ and D-) are correctly connected to the components that require data transmission, such as USB devices or display ports. Incorrect connections can result in no display output.
- Test with a Different Monitor: Sometimes, the issue may not be with the motherboard but with the monitor or its connection. Try connecting a different monitor to rule out this possibility.
3. Unresponsive Front Panel Buttons
- Verify the Reset and Power Button Connections: Check that the reset (RST) and power (PWR_SW) pins are correctly wired to the corresponding front panel buttons. If these buttons are unresponsive, it could indicate a loose or incorrect connection.
- Inspect the Front Panel Connectors: Sometimes, the issue lies with the front panel connectors themselves. Inspect them for any damage or wear and replace them if necessary.
4. Hard Drive Not Detected
- Check the Hard Drive Connections: Ensure that the hard drive is properly connected to the TX1 pinout, with the correct power and data lines in place. A loose connection can result in the hard drive not being detected by the system.
- Test with Another Drive: To rule out the possibility of a faulty hard drive, try connecting a different drive to see if it is detected. If the second drive works, the issue may be with the original drive.
Expert Tips for Working with TX1 Pinout
For those who are more experienced or want to ensure the best results when working with the TX1 pinout, here are some expert tips:
- Use a Multimeter: A multimeter is an invaluable tool for checking the continuity of connections and verifying the voltage levels on the power pins. This can help prevent potential issues before they cause damage.
- Label Your Cables: When working with multiple connections, it’s easy to lose track of which cable goes where. Labeling your cables can save time and reduce the risk of making incorrect connections.
- Keep the Manual Handy: Always keep the motherboard manual within reach when working with the TX1 pinout. It contains detailed diagrams and instructions that can guide you through complex connections.
- Perform a Dry Run: Before finalizing all connections, perform a dry run by loosely connecting the components and testing the system. This allows you to make adjustments without committing to a permanent setup.
Acer Aspire XC-603G BIOS Reset
Reset the BIOS on your Acer Aspire XC-603G, you can remove the CMOS battery from the motherboard for a few minutes and then put it back. This will reset the settings to their default values.
Acer Aspire XC-603G Blank Screen
If your Acer Aspire XC-603G shows a blank screen, check the power connections, monitor cables, and make sure the RAM is properly seated. Sometimes, resetting the BIOS or updating the graphics driver can fix the issue.
Acer Aspire XC-603G Motherboard Manual
You can find the Acer Aspire XC-603G motherboard manual on Acer’s official website or by searching the model number online. The manual includes detailed instructions on hardware components, installation, and troubleshooting tips.
Acer Aspire XC-603G heat sink screws missing
If the heat sink screws are missing on your Acer Aspire XC-603G, you can find replacements at computer hardware stores or online. Make sure to get the correct size to securely fasten the heat sink and prevent overheating.
What is the specs of Acer Aspire XC 603G?
The Acer Aspire XC-603G comes with an Intel Pentium J2900 processor, 4GB of RAM, a 500GB hard drive, and integrated Intel HD Graphics. It’s a compact desktop designed for basic computing tasks like browsing, word processing, and media playback.
What motherboard is in the Acer Aspire TC 885?
The Acer Aspire TC-885 typically comes with a custom-made motherboard that supports Intel 8th and 9th Gen processors. It features DDR4 RAM slots, PCIe slots for expansion, and multiple USB ports. The exact model may vary depending on the specific configuration.
What to upgrade on Acer XC 603G?
To upgrade the Acer XC-603G, consider adding more RAM for better multitasking, replacing the hard drive with an SSD for faster load times, or adding a dedicated graphics card if your model allows it. These upgrades can improve performance for everyday tasks.
How to get PCI in AXC-603G?
The Acer Aspire XC-603G has a limited number of PCIe slots, typically used for adding expansion cards like graphics cards or network adapters. To use PCI slots, open the case, locate the available slot, and carefully insert your expansion card. Make sure it’s securely connected before closing the case.
FAQS:
1. What is the Acer Aspire XC-603G motherboard TX1 pinout?
Acer Aspire XC-603G motherboard TX1 pinout shows the connection layout for the TX1 connector, helping to connect cables and components.
2. How can I use the TX1 pinout for troubleshooting?
Use the TX1 pinout to check connections for issues like power failures or unresponsive components.
3. Can I connect extra storage using the TX1 pinout?
Yes, you can add extra storage by correctly wiring the power and data lines to the TX1 pinout.
4. Is it possible to add LED lighting to the TX1 pinout?
Yes, you can connect LED strips to the TX1 pinout using the appropriate power and control pins.
5. What should I check if my system doesn’t power on?
Ensure the power switch is correctly connected to the PWR_SW pin on the TX1 pinout.
Conclusion:
In Conclusion, understanding the TX1 pinout on the Acer Aspire XC-603G motherboard is essential for proper system setup and troubleshooting. Knowing how to connect power, data, and control pins helps ensure your computer functions correctly. This guide provides a clear overview of the TX1 pinout layout and its practical applications for upgrades and customization.
Read also: